
Contrary to popular belief, fall-proofing your home isn’t about major renovations or simply clearing clutter. It’s about training your eyes to perform a forensic audit, spotting the ‘invisible’ hazards created by decades of habit—subtle lighting issues, familiar trailing cables, and even the wrong pair of slippers. This guide teaches you the expert mindset needed to see your home not as you know it, but as a falls prevention coordinator would, turning a familiar space into a genuinely safer one.
For over thirty years, your home has been your sanctuary. Every corner holds a memory, and every pathway is known by heart. It’s this very familiarity that creates a dangerous illusion of safety. We tend to focus on obvious risks like clutter, but the greatest dangers are often the ones we no longer see—the subtle environmental flaws that have blended into the background. This is a phenomenon known as environmental blindness, where the brain stops registering persistent, low-level hazards.
You may have already taken steps like tidying up walkways or adding a bath mat, but these common solutions barely scratch the surface. The real work of fall prevention is a forensic investigation. It requires looking at your home with fresh eyes, questioning every detail from the quality of light in a hallway to the torsional rigidity of your house shoes. It means understanding the mechanics of how a shuffling gait interacts with a rug edge or why a standard 60-watt bulb can create a zone of temporary blindness.
But what if the key to safety wasn’t just removing things, but fundamentally understanding the interaction between your body, your habits, and your environment? This guide is designed to give you that expert perspective. We will move beyond the generic advice and dissect the micro-environments of your home. We’ll explore the science behind why certain layouts are treacherous and provide actionable, elegant solutions to secure your home without sacrificing its character. This isn’t about living in a sterile, empty space; it’s about making intelligent, informed adjustments that preserve both your independence and your well-being.
To help you conduct this detailed audit, we will break down the key risk areas room by room. The following sections provide a structured approach to identifying and neutralizing the most common yet overlooked hazards in your home.
Summary: A Forensic Guide to Uncovering Hidden Fall Risks at Home
- Why are traditional UK hallways the number one spot for falls among seniors?
- Why is a 60-watt bulb no longer sufficient for aging eyes in hallways?
- How to secure trailing wires without ugly gaffer tape everywhere?
- Double-sided tape vs removing rugs entirely: which is safer for shuffling gaits?
- The mistake of using thick bath mats on top of non-slip flooring
- How to choose R11 rated flooring that doesn’t look like a hospital floor?
- When to ditch the slip-on slippers: the 3 features of a safe house shoe
- The error of using a retractable lead that causes entanglement falls
Why are traditional UK hallways the number one spot for falls among seniors?
Traditional hallways, particularly those in older UK homes, often represent a ‘perfect storm’ of fall hazards. Their inherent narrowness restricts movement, making it difficult to recover from a minor stumble. More importantly, they are transition zones. You move from a bright living room into a dimmer hall, or from a carpeted area to a hard floor. These transitions are where the brain and body are most vulnerable. The constant presence of these environmental risks is a major contributor to falls; in fact, research shows that environmental factors account for 30%-50% of falls in older adults.
The primary culprits in these spaces are often a combination of factors that, in isolation, seem minor. Consider the typical hallway: multiple doorways create subtle changes in floor level (thresholds), a coat rack may slightly impede the walkway, and the lighting is often inconsistent. These elements force constant, subconscious micro-adjustments in gait and balance.
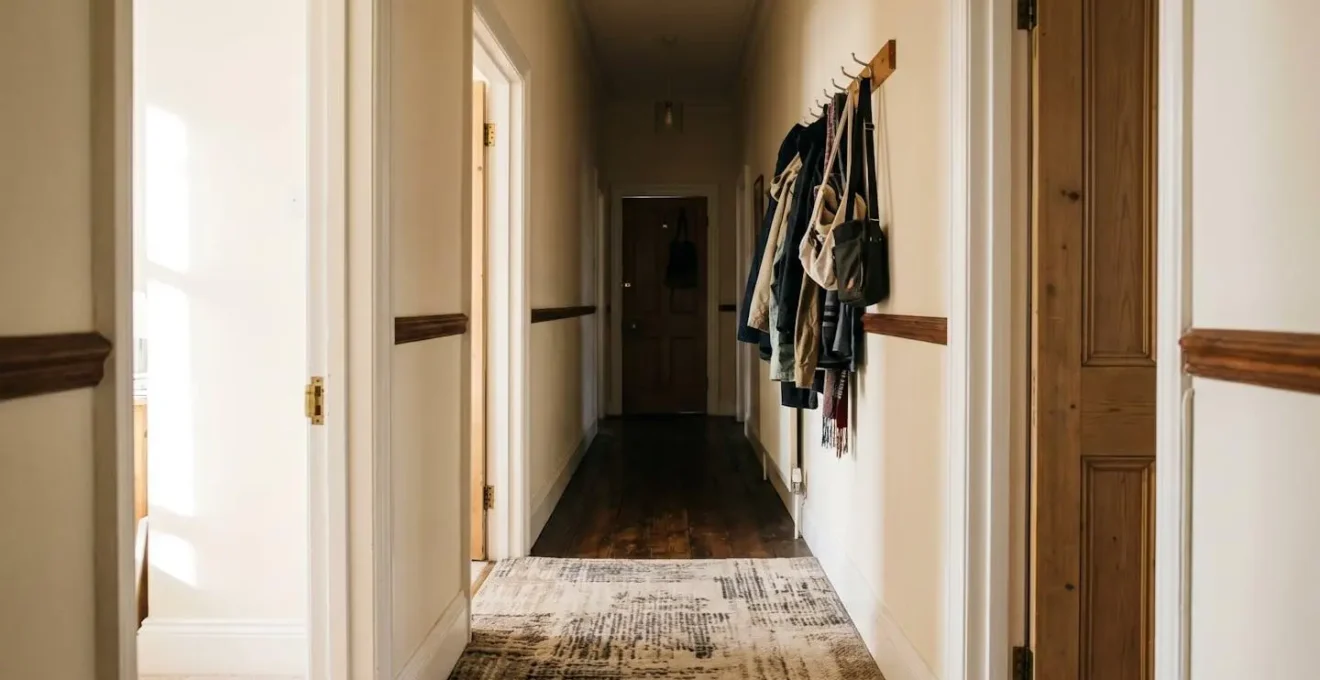
As the image above illustrates, the transition from a brightly lit room to a darker corridor creates a moment of ‘threshold blindness’ where the eyes struggle to adapt. During these few seconds, a small object on the floor or an uneven surface becomes effectively invisible. This is why a forensic audit of a hallway must focus on flow and consistency—ensuring even lighting, seamless floor surfaces, and a clear, unobstructed path from one end to the other. It’s not just about space, but about managing sensory transitions.
Why is a 60-watt bulb no longer sufficient for aging eyes in hallways?
As we age, the physiology of our eyes changes significantly. The pupils become smaller and less responsive to changes in light, and the lens can yellow, filtering out certain light wavelengths. As a result, a person over 60 may need three to four times more light than a 20-year-old to see the same object with the same clarity. This is why a standard 60-watt incandescent bulb, once the hallmark of home lighting, is dangerously insufficient for a senior’s primary walkways. It simply doesn’t provide the level of illumination needed to detect subtle hazards like a misplaced shoe or a slight rise in the carpet.
The problem is compounded by the eye’s slower adaptation speed. Moving from a bright area to a dimly lit one creates a temporary period of near-blindness. In a hallway, this can be disastrous. The goal of a lighting audit is to eliminate these dark zones and create a consistent, bright path. This means upgrading from low-wattage bulbs to higher-lumen alternatives like LEDs. Look for bulbs that provide at least 800-1100 lumens (the equivalent of a 75-100W incandescent bulb) for general hallway lighting.
Furthermore, the quality of light matters as much as the quantity. A single, harsh overhead light can create deep shadows, which can be misinterpreted by the brain as obstacles or steps. The best approach is layered lighting: a bright overhead fixture combined with lower-level lighting, such as nightlights or wall sconces, to illuminate the floor path directly. This ensures that the walking surface is always clearly visible, eliminating guesswork and reducing the risk of a misstep. Prioritizing robust, layered lighting is one of the most effective fall prevention strategies you can implement.
How to secure trailing wires without ugly gaffer tape everywhere?
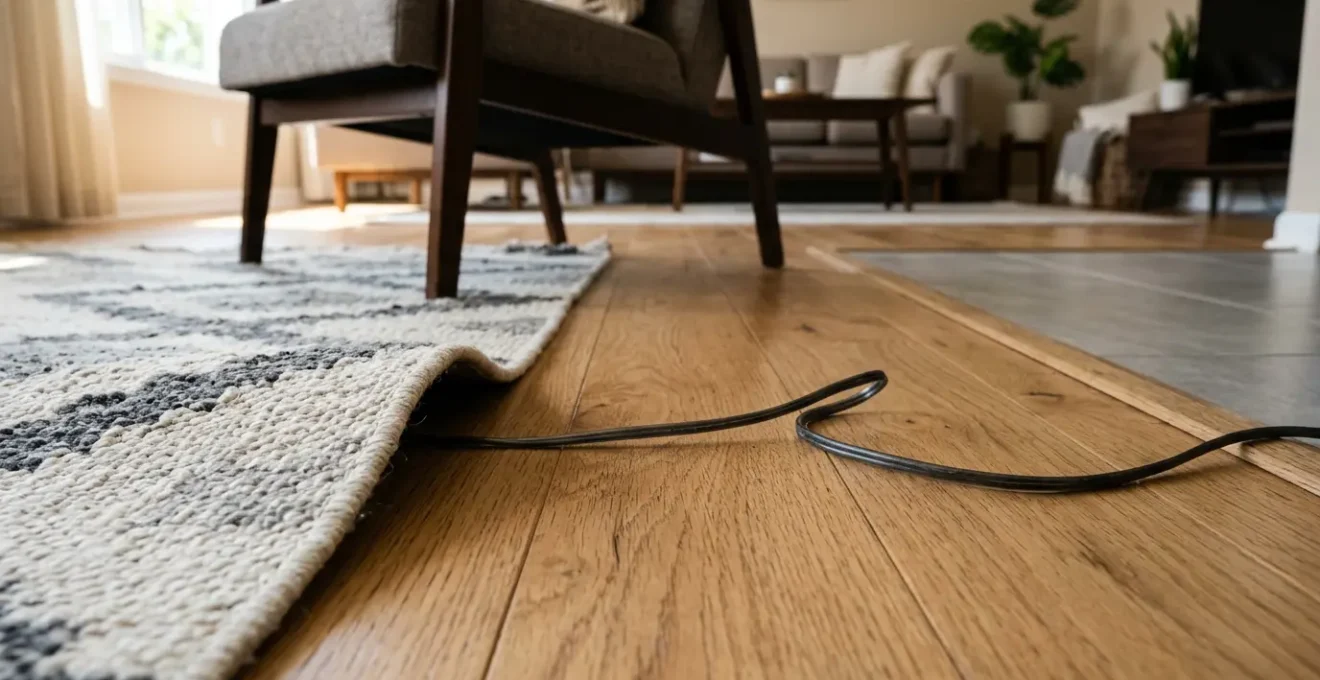
Trailing wires from lamps, televisions, and charging cables are a classic trip hazard, precisely because they are so common we become blind to them. They often lie in the ‘get-up zone’—the critical three-foot area around a chair or sofa where we transition from sitting to standing. A foot entangled at this moment is a primary cause of falls. While gaffer tape is a quick fix, it’s unsightly and can damage floors. A more effective and elegant approach involves strategic cable management that removes the hazard entirely from walkways.
The first step is to rethink where you charge devices. Instead of using the nearest outlet, create dedicated ‘charging zones’ in low-traffic areas, such as on a corner table or a bookshelf. For permanent electronics like TVs and lamps, the goal is to guide cables along walls and furniture rather than across open floors. Modern solutions are far more discreet than tape. You can use thin, paintable cable channels that blend into baseboards or run flat, braided cables under rugs (provided the rug itself is secured).
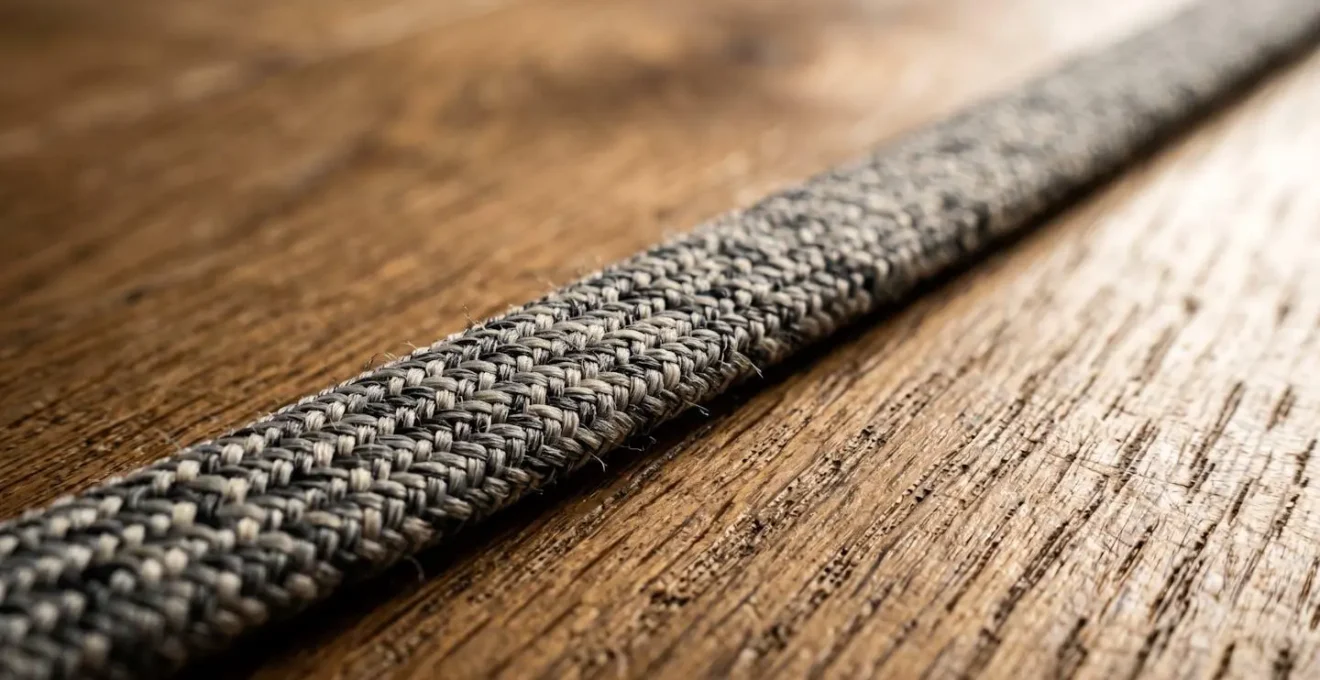
As the detailed image shows, a flat, fabric-braided cable lies completely flush with the floor, eliminating the small loop of a traditional round cable that is so easy to catch with a foot. Investing in these types of cables for high-traffic areas is a simple yet powerful upgrade. For clusters of wires behind a media center, a cable management box can contain the ‘nest’ of cords, keeping them organized and off the floor.
Your Action Plan: Forensic Cable Audit
- Conduct a ‘Cable Nest’ audit: Identify all charging cables and electronics in high-traffic pathways, especially in living rooms and bedrooms.
- Create dedicated ‘charging zones’: Relocate charging stations to furniture against walls or in corners, away from primary walkways.
- Coil and secure cords off the floor: Use self-adhesive cable clips to run cords along the back of furniture or up walls to keep them completely clear of foot traffic.
- Establish a ‘Get-Up Zone’ rule: Maintain a 3-foot (1-meter) clear zone around any chair, sofa, or bed where a person stands up, ensuring no cables cross this high-risk area.
- Replace and upgrade: Swap coiled or round plastic cables in walkways for flat or weighted-end cables that lie naturally flush against the flooring.
Double-sided tape vs removing rugs entirely: which is safer for shuffling gaits?
Throw rugs are a major point of contention in fall prevention, and the debate between securing them or removing them is nuanced. For individuals with a « shuffling gait »—a common walking pattern in older adults where the feet do not lift fully off the ground—any raised edge becomes a significant hazard. In this context, even a well-taped rug can pose a risk. The edge of the tape or the slight thickness of the rug itself can be enough to catch the front of a shoe, leading to a fall. The stark reality is that 55 percent of fall injuries among older people occur inside the home, with floor coverings being a primary culprit.
From a purely clinical safety perspective, removing all small throw rugs is the safest option. It eliminates the hazard of tripping over a curled edge or a bunched-up mat entirely. This creates a smooth, predictable surface that is easiest to navigate. However, this approach can make a space feel cold and uninviting, and hard floors can be less comfortable. It may also remove a visual anchor that helps with spatial orientation.
If removing a rug is not desirable, the method of securing it is critical. Heavy-duty, full-surface rug tape or a high-quality, non-slip rug pad that covers the entire underside of the rug is far superior to simply taping down the corners. The goal is to make the rug an integral part of the floor, with no possibility of any edge lifting. You should be able to run a vacuum over the edge without it catching. For a shuffling gait, the absolute best practice is to choose very thin, low-pile rugs and ensure their edges are completely flush with the floor. If any edge can be lifted with a foot, the risk remains, making removal the safer choice.
The mistake of using thick bath mats on top of non-slip flooring
The bathroom is statistically the most hazardous room in the home, yet it’s where we often make a critical safety error. Many modern bathrooms are wisely fitted with non-slip flooring. However, people then place a small, thick, plush bath mat on top of this safe surface. In doing so, they are inadvertently re-introducing a major hazard. A thick mat on a hard floor creates an unstable, high-profile obstacle. Its edges are easy to trip on when entering or exiting the shower, and the mat itself can slip, negating the benefit of the flooring beneath it.
A comprehensive study on home hazards provided stark evidence for this. An Australian survey of homes of people aged 70+ found that the bathroom was the most hazardous room, with 66% of bathrooms having at least one hazard. Crucially, hazards related to floor surfaces were present in 62% of all homes inspected. The study also revealed a dangerous perception gap: 30% of seniors who rated their homes as ‘very safe’ actually had five or more significant hazards present.
This highlights the danger of the « invisible » hazard. The bath mat is seen as a comfort item, not a risk. The correct approach is to either eliminate the mat entirely and rely on the non-slip flooring, or to use a very thin, low-profile mat with a full-surface rubber backing that grips the floor firmly. This type of mat should be almost level with the floor, presenting no significant edge to trip over. The mat should be large enough to step onto with both feet comfortably, providing a stable, single surface rather than a small, unsteady island in the middle of the floor.
How to choose R11 rated flooring that doesn’t look like a hospital floor?
Choosing safe flooring is one of the most fundamental steps in fall-proofing a home, but many people are deterred by the fear of an institutional or clinical aesthetic. Fortunately, flooring technology has evolved dramatically. It’s now possible to find flooring with high safety ratings that mimics the warm, natural appearance of wood or stone. The key is to understand the rating systems. For residential settings, the most important rating is the ‘R’ value, which measures slip resistance on a scale from R9 to R13.
While R9 might be sufficient for a dry bedroom, for areas that can get wet or have high traffic—like kitchens, hallways, and entryways—an R11 rating is the recommended standard for enhanced safety. In the past, achieving an R11 rating often meant a visibly textured, commercial-grade surface. Today, manufacturers use micro-texture technology, an almost invisible surface profile that provides excellent grip without a rough or industrial look. This means you can get luxury vinyl tile (LVT) or porcelain tile with an R11 rating that is indistinguishable from natural oak or slate.
For bathrooms, a different rating system is often used: the A-B-C scale for barefoot areas. For maximum safety, you should look for flooring rated at least Class B. The ultimate confirmation of a floor’s safety, however, can be its Pendulum Test Value (PTV). A PTV of 36 or higher indicates a low slip potential, even in wet conditions. When shopping, don’t be afraid to ask the supplier for the technical specifications, specifically the R-rating and PTV.
| Rating System | Application Area | Safety Level | Aesthetic Options | Recommended For Seniors |
|---|---|---|---|---|
| R9-R10 | Indoor dry areas (bedrooms, living rooms) | Basic slip resistance | Wide range (wood-effect LVT, porcelain, laminate) | Low-traffic rooms only |
| R11 | Indoor wet-prone areas (kitchens, laundry) | Enhanced slip resistance | Modern wood-effect, stone-effect LVT with invisible micro-texture | Recommended for most indoor spaces |
| R12-R13 | Outdoor/commercial high-slip areas | Maximum slip resistance | Limited (more textured, industrial appearance) | Outdoor pathways, garage entry only |
| Class A-B-C (Barefoot) | Bathrooms, pool areas (barefoot zones) | Wet barefoot slip resistance | Class B: Moderate options; Class C: Highest safety, textured tiles | Class B minimum for bathrooms |
| PTV Rating (40+) | Alternative measurement (Pendulum Test Value) | PTV 36+: Low slip; PTV 40+: Moderate slip | Material-agnostic (focus on coefficient of friction) | Verify PTV 40+ for any flooring choice |
When to ditch the slip-on slippers: the 3 features of a safe house shoe
The comfortable, backless slipper is one of the most dangerous items in a senior’s wardrobe. Because it isn’t secured to the foot, the wearer must unconsciously grip with their toes or shuffle their feet to keep it on. This alters natural gait, increases the risk of the slipper flying off, and makes tripping over a small obstacle much more likely. A forensic audit of personal safety must include a critical evaluation of indoor footwear. A safe house shoe is not just a slipper; it’s a piece of engineered safety equipment.
There are three non-negotiable features to look for in a safe indoor shoe. The first is a structured heel counter. This is the rigid part at the back of the shoe that cups the heel. A firm heel counter prevents the heel from lifting out of the shoe during walking, which is the primary danger of slip-ons. You can test this by pressing on the heel; it should be firm and resist compression. This « heel lock » provides essential stability.
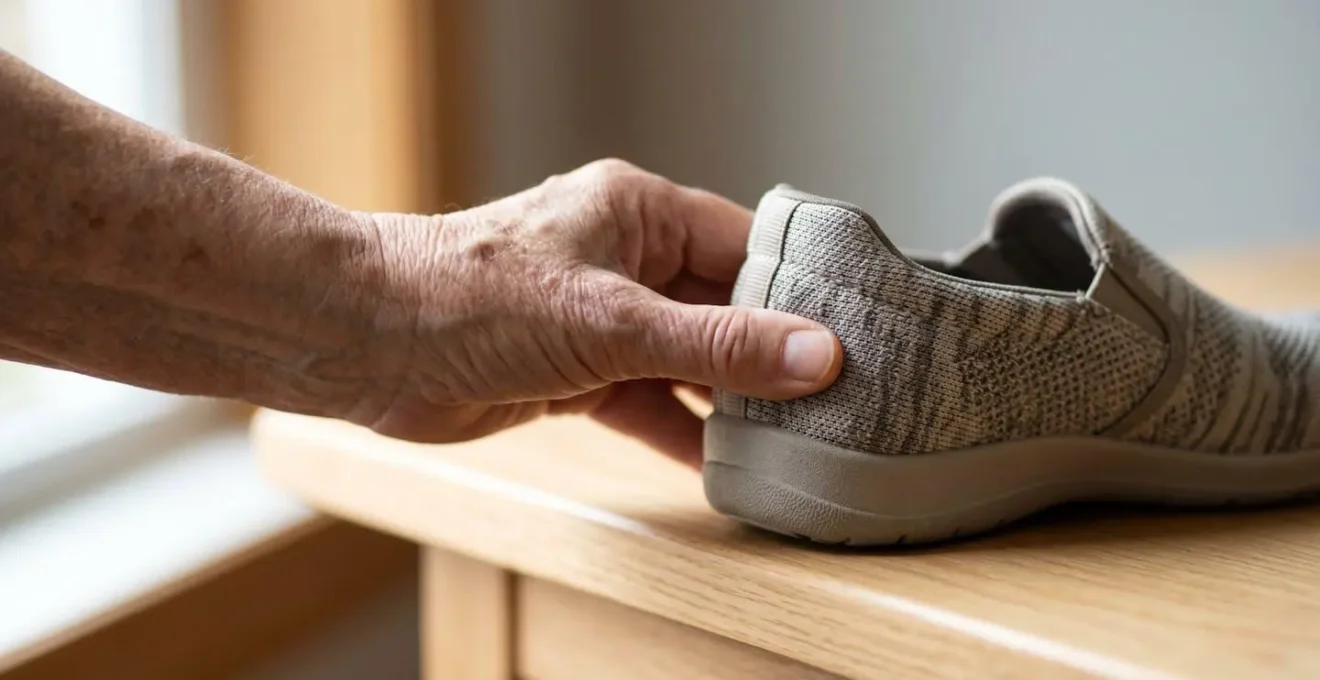
The second feature is a combination of torsional rigidity and forefoot flexibility. A safe shoe should resist being twisted (like wringing out a towel), which provides lateral stability to prevent ankle rolls. However, it must bend easily at the ball of the foot to allow for a natural walking motion. The final key feature is a ‘no-hitch’ outsole. While high-friction rubber is good, deep, aggressive treads designed for hiking can easily catch on indoor flooring or rug edges. The ideal indoor sole has a relatively smooth, wide tread pattern that provides grip without grabbing.
As a bonus, consider the interaction between the shoe and sock. Thick, synthetic socks inside a slightly-too-large shoe can create an internal slippery surface, completely negating the shoe’s safety features. Pairing a well-fitting shoe with thin, natural-fiber socks provides the most secure and stable foundation for walking indoors.
Key Takeaways
- Familiarity breeds risk: The biggest dangers are often ‘invisible’ hazards you’ve stopped noticing in your own home.
- Light is a safety tool: Aging eyes need 3-4 times more light; upgrade to high-lumen, layered lighting in all walkways.
- The floor is the foundation: Remove or fully secure all rugs, and choose flooring with a minimum R11 slip-resistance rating for key areas.
- Footwear matters: Ditch backless slippers for supportive indoor shoes with a firm heel counter, a rigid midsection, and a non-grabbing sole.
The error of using a retractable lead that causes entanglement falls
For many seniors, a pet is a cherished companion, but it can also introduce a unique and dynamic fall risk into the home. One of the most common culprits is the retractable lead. While convenient for outdoor walks, using one indoors is a serious mistake. The thin, often dark-colored cord can extend across a hallway or living room, creating a taut, nearly invisible tripwire. The danger is so significant that fall statistics reveal that more than 80,000 people a year in the U.S. are sent to the hospital for falls caused by pets.
A retractable lead creates an unpredictable environment. The length of the cord is constantly changing, making it impossible for your brain to map a safe path. A sudden movement by the pet can pull the line taut across your walkway in an instant. This can lead to a direct trip or an entanglement around the ankles, which is especially dangerous when getting up from a chair or navigating a narrow space.
The solution is to establish firm rules for pet management indoors. First, replace the retractable lead with a short, fixed-length (4-6 foot) leash for any indoor movements where control is needed. A fixed leash creates a predictable, manageable radius around your pet. Second, create ‘pet-safe zones’ using stylish indoor gates to keep pets out of high-traffic areas during busy times, like when you’re carrying items or preparing meals. Teaching a ‘place’ or ‘stay’ command is also invaluable, allowing you to move through the home while your pet remains in a designated spot. Finally, a simple but effective trick is to attach a small bell to your pet’s collar. This provides a constant auditory cue of their location, reducing the chance of being surprised by them underfoot.
The first step to a safer home is to look at it with new eyes. Take this guide and walk through each room, not as its owner, but as a falls prevention investigator. Question everything. Challenge your habits. By transforming your mindset, you can neutralize the invisible risks and ensure your home remains a true sanctuary for years to come.