
From a product safety perspective, suction grab bars are not a safe alternative to screwed-in rails; their failure is a matter of when, not if, due to the fundamental physics of vacuum mechanics.
- Even perfectly smooth-looking tiles possess micro-porosity that inevitably allows air to break the vacuum seal over time, leading to sudden, catastrophic failure.
- Safety indicators (red/green) only confirm initial suction, not its long-term integrity, creating a dangerous false sense of security.
- The distinction between a « balance aid » and a « weight-bearing » rail is academic during an actual slip, where unpredictable shear forces far exceed what a suction cup can handle.
Recommendation: For genuine safety in a rental property, do not rely on suction devices. Instead, pursue permanent, screwed-in grab rails by formally requesting a ‘reasonable adjustment’ from your landlord under the UK’s Equality Act 2010.
For renters or travellers needing temporary bathroom support, the suction grab bar presents itself as an ideal solution: no drilling, no permanent marks, just instant safety. This convenience is heavily marketed as a quick fix for anyone unable or unwilling to alter their bathroom walls. The promise is simple—flip a lever, and a powerful vacuum lock provides a sturdy handle right where you need it. But from a product safety and engineering standpoint, this promise is built on a foundation as fragile as the vacuum it creates.
The common advice is to use them only on « suitable surfaces » and to treat them as « balance aids, » not for full weight support. However, this guidance dangerously underestimates the real-world conditions of a humid UK bathroom and the physics of a fall. The critical failure point isn’t user error; it’s an inherent design limitation. A slip doesn’t involve a gentle, controlled pull; it’s a sudden, high-impact shear force that these devices are fundamentally not designed to withstand.
This article moves beyond the marketing claims to provide a skeptical, scientific analysis. We will deconstruct the mechanics of why suction fails, scrutinize the misleading nature of safety indicators, and clarify the life-or-death distinction between a balance aid and a truly weight-bearing rail. Most importantly, we will outline the genuinely safe and legally supported alternatives available to tenants and visitors in the UK, ensuring that safety is based on structural integrity, not a false sense of security.
This comprehensive guide will walk you through a scientific breakdown of suction grab bar mechanics, your legal rights as a UK tenant, and the practicalities of choosing genuinely safe alternatives for bathrooms and home access. The following sections will provide the evidence you need to make an informed decision.
Summary: A Scientific Investigation into Suction Grab Bar Safety
- Why do suction bars fail instantly on porous or textured tiles?
- How to request permission for screwed grab rails as a ‘reasonable adjustment’?
- Red/Green safety indicators: do they really guarantee the bar is secure?
- The mistake of treating a balance aid as a weight-bearing handle
- Where to position a grab bar for the safest exit from a bath?
- Wall-mounted vs freestanding stool: which is safer for a small cubicle?
- Folding suitcase ramps vs permanent concrete: which is best for visitors?
- How to choose the right threshold ramp for a UPVC door frame?
Why do suction bars fail instantly on porous or textured tiles?
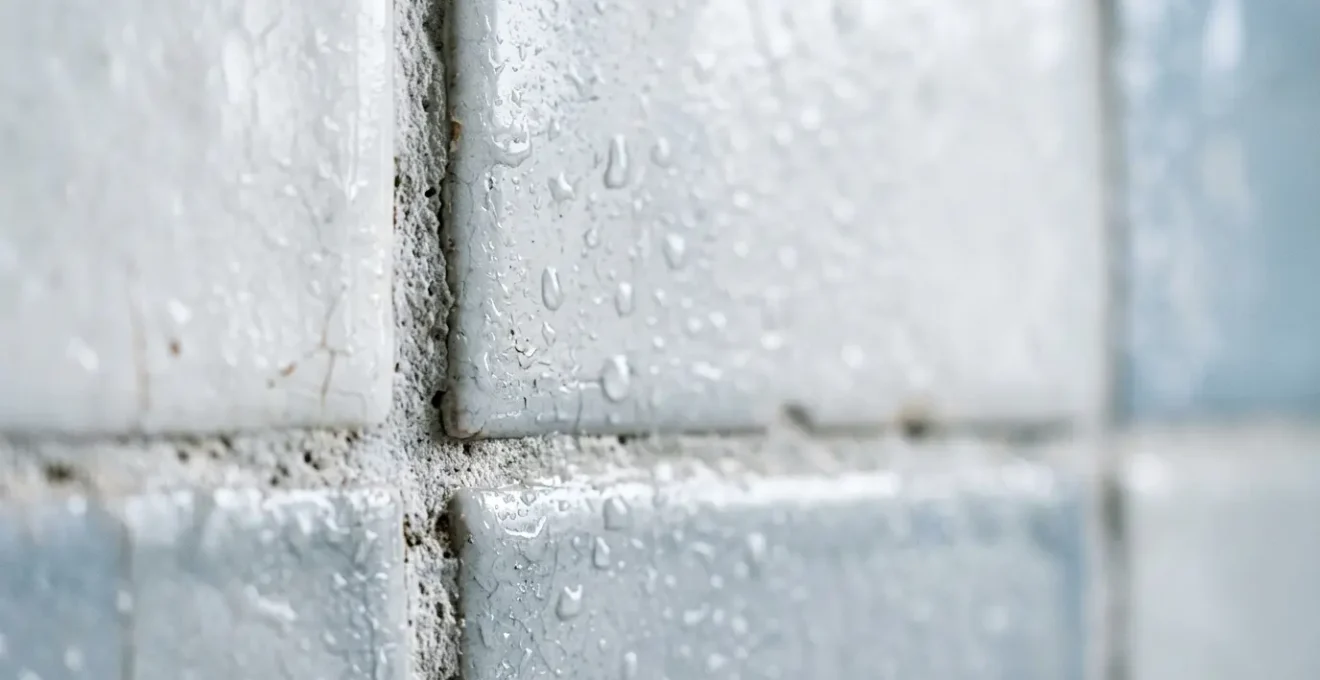
The effectiveness of a suction grab bar depends entirely on creating and maintaining a perfect vacuum. This is a feat of physics that is nearly impossible to guarantee in a typical bathroom environment. The core reason for failure is micro-porosity. To the naked eye, a glazed ceramic or porcelain tile may appear perfectly flat and non-porous. However, at a microscopic level, the surface contains minuscule imperfections and pores that allow air to slowly seep in, breaking the vacuum seal over time. This process is accelerated by temperature fluctuations and the high humidity of a bathroom, which can exceed the 65% humidity threshold under which the rubber suction pads are designed to operate effectively.
To understand why this is not a random occurrence but an inevitability, consider the data. A controlled lab environment is the best-case scenario for these devices, yet failure is still rampant. In fact, at least one handhold on each wall sample failed on day one during a 28-day testing period, according to a 2025 laboratory study. This demonstrates that even under ideal conditions, the vacuum is not stable. The failure isn’t gradual; it’s a sudden and catastrophic failure, offering no warning to the user who has placed their trust in it.
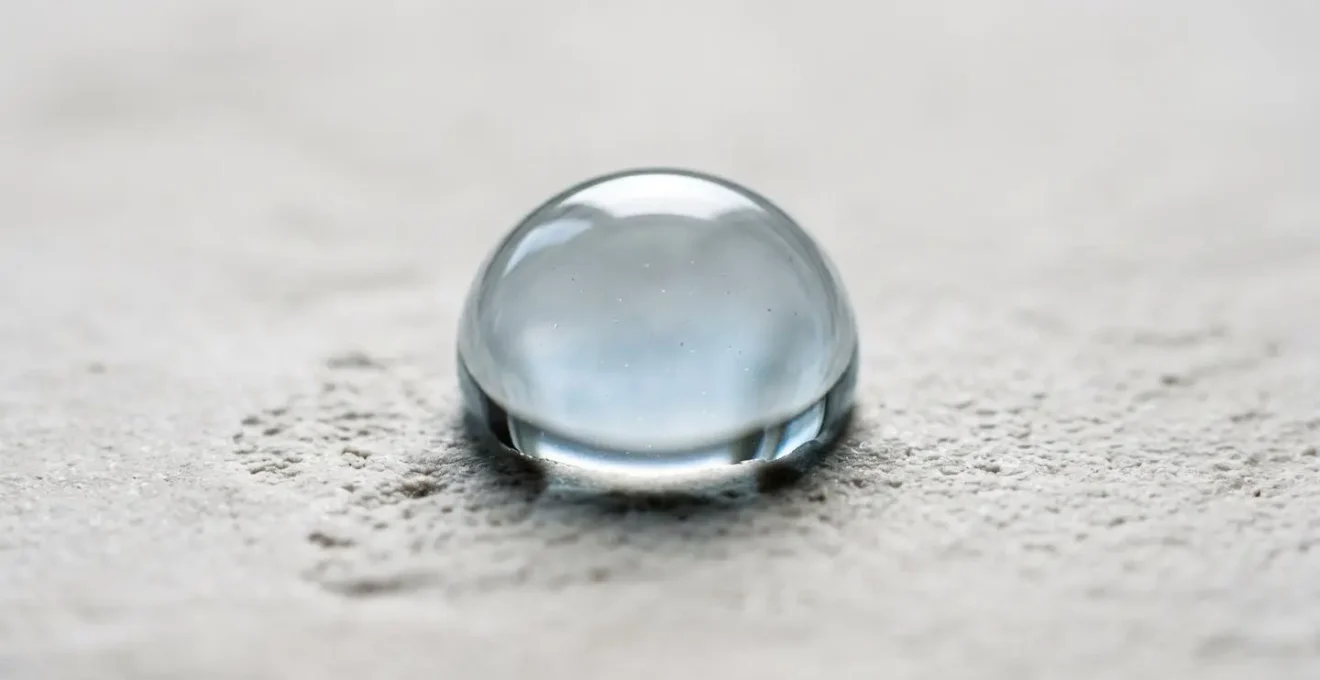
As the image above illustrates through the behaviour of a water droplet, surface properties are key. Any deviation from a perfectly smooth, non-porous surface compromises the seal from the moment of installation. This is why manufacturers provide a strict list of unsuitable surfaces, which unfortunately describes a large number of modern UK bathrooms.
- Grout seams: Suction discs cannot maintain a seal when positioned over grout lines.
- Textured surfaces: Any texture, no matter how subtle, prevents a perfect vacuum from forming.
- Small tiles: Tiles smaller than 4×4 inches do not provide enough surface area for the suction discs to activate properly.
- Porous surfaces: The device simply cannot adhere to any surface that is not completely non-porous and smooth.
The fundamental takeaway is that the device’s failure is not a defect, but an inherent characteristic of its operating principle when applied to real-world, imperfect surfaces.
How to request permission for screwed grab rails as a ‘reasonable adjustment’?
For any renter in the UK, the fear of damaging property or losing a security deposit is a major barrier to installing permanent safety features. However, UK law provides a powerful tool to overcome this. The Equality Act 2010 places a legal duty on landlords to make ‘reasonable adjustments’ for tenants with disabilities. This is not a suggestion but a legal requirement. As the charity Inclusion London clarifies in their guidance, landlords have a legal duty to make reasonable adjustments for Disabled tenants. Installing a screwed-in grab rail to prevent falls and allow safe use of the bathroom is a classic example of such an adjustment.
The key is to approach this not as a casual request, but as a formal process invoking your legal rights. A verbal chat can be easily dismissed, but a written request citing the specific legislation carries significant weight. Landlords are often concerned about water damage from improper installation, so proactively addressing this by offering to use a professional installer can alleviate their fears and demonstrate reasonableness. Furthermore, obtaining an assessment from an Occupational Therapist (OT) via your local council or the NHS provides an official, expert recommendation that is very difficult for a landlord to refuse without strong justification.
Following a structured process removes ambiguity and establishes a clear paper trail, which is vital if the landlord is unresponsive or refuses the request. Knowing your rights transforms the conversation from asking for a favour to asserting a legal entitlement to a safe living environment.
Your Action Plan: Requesting a Grab Rail Under the Equality Act 2010
- Formal Written Request: Send a letter or email to your landlord specifying you are requesting a ‘reasonable adjustment’ under the Equality Act 2010 for disability-related needs.
- Explain the Need: Clearly state how installing permanent grab rails will prevent falls and enable you to use the bathroom facilities safely.
- Address Concerns: Propose using a professional installer to ensure the bathroom’s waterproofing membrane is protected, and offer to arrange this yourself.
- Obtain Expert Backing: Contact your local council or NHS to request an Occupational Therapist (OT) assessment. An official OT report is your strongest piece of evidence.
- Set Expectations: Once the request is made, the landlord must respond within a reasonable period (typically 42 days) and provide written reasons for any refusal. If they fail to do so, they are in breach of their duty.
Red/Green safety indicators: do they really guarantee the bar is secure?
One of the most persuasive marketing features of suction grab bars is the colour-coded safety indicator, which typically shows green for a secure lock and red for an insecure one. This feature is designed to inspire confidence, but from a safety testing perspective, it creates a deeply dangerous false sense of security. The indicator confirms only one thing: that a vacuum was successfully created at the moment of installation. It provides absolutely no information about the long-term integrity of that vacuum or the suitability of the surface it’s attached to.
The indicator cannot detect the slow, inevitable ingress of air through a tile’s micro-porosity. It cannot warn you that steam from your shower is degrading the rubber seal. It will remain green, indicating « safe, » right up to the second the vacuum catastrophically fails and the bar detaches from the wall. This is the critical flaw that makes these devices so treacherous. As one Certified Aging-in-Place Specialist (CAPS) warns, « These devices give a false sense of security. When they fail — and they do — the results are catastrophic. »
The real-world consequences of relying on these indicators can be severe, transforming a tool meant to prevent injury into the direct cause of one. The following case illustrates this perfectly.
Case Study: The Danger of a « Green » Indicator
Mr. Thompson, a 45-year-old man recovering from knee surgery, installed suction grab bars to aid his rehabilitation. The safety indicator on the bar showed green, confirming a « secure » attachment. While using the bar to lower himself onto the toilet, it suddenly detached from the wall without warning. He fell onto the hard bathroom floor, suffering a concussion and facial injuries that significantly prolonged his recovery. This case demonstrates that the safety indicator confirms only the initial vacuum creation, not the sustained holding capacity required for actual use.
The green light is not a guarantee of safety; it is merely a snapshot of a single moment in time. Trusting it is like trusting a photograph of a bridge to prove it’s still safe to cross months later. The forces of physics are constantly working to undermine the seal, and the indicator is blind to this process.
The mistake of treating a balance aid as a weight-bearing handle
Manufacturers often defend suction grab bars by stating they are intended as « balance aids, » not for supporting full body weight. This distinction is technically correct but practically meaningless in the context of a fall. A slip is not a controlled event. It involves a sudden, reflexive grab, applying immense and unpredictable forces to the handle. The critical forces at play are shear force (a sideways, tearing motion) and tensile load (a direct pull). While a suction cup might resist a slow, steady pull, it has almost no resistance to the shear force generated when a person’s body weight yanks downward and sideways during a slip.
This is where the engineering difference becomes a matter of life and safety. Properly installed, screwed-in grab bars are anchored into the wall studs and are subject to rigorous standards. For instance, ADA-compliant grab bars must support a minimum of 250 lbs (approx. 113 kg) of force, a standard most suction bars cannot and do not claim to meet. They are designed to handle the sudden, dynamic loads of a real-world fall.
Treating a suction bar as a reliable safety device in a wet, slippery environment is a fundamental misunderstanding of the physics involved. The « light touch for balance » scenario vanishes the moment stability is actually lost. At that point, the user needs a weight-bearing anchor, and a suction cup is simply not that. The following scenarios highlight when a true weight-bearing rail is non-negotiable versus the very limited situations where a balance aid might be cautiously considered.
- Requires Weight-Bearing Rail: Transferring from a toilet, lifting your body out of a bathtub, recovering from a slip, or supporting yourself during a dizzy spell. These all involve significant dynamic pulling and leverage.
- Requires Weight-Bearing Rail: Any user with significant mobility impairment who relies on grab bars for most movements.
- Potentially Suitable for Balance Aid (with extreme caution): Gentle steadying while standing still in the shower, light hand placement while stepping over a low bath edge, or for psychological reassurance by users with very mild balance concerns who rarely apply force and test the device daily.
The margin for error is non-existent. Assuming you will only ever need a « balance aid » is a gamble against the unpredictable nature of a fall.
Where to position a grab bar for the safest exit from a bath?
While suction bars are an unreliable choice, professionally installed, screwed-in grab bars are a proven safety intervention. Their effectiveness, however, depends entirely on correct placement. A single, poorly positioned bar is far less effective than a system of bars that provides a continuous « chain of support » throughout a high-risk movement, like exiting a bathtub. Research confirms their value; a 2023 study found that participants with a grab bar were 75.8% more likely to recover their balance during bathtub exit tasks. The key is to position them to assist the three distinct stages of the movement.
The process of exiting a bath is not a single action but a sequence, and each stage requires support in a different location and orientation. A systems approach that considers the user’s entire range of motion is the only way to ensure comprehensive safety.
- Stage 1 – Standing Up Inside the Bath: The first challenge is rising from a seated or kneeling position on a wet, slippery surface. A vertical grab bar installed on the wall at the side of the tub (near the taps) is essential here. Placed at a height of 33-36 inches from the bathroom floor, it allows the user to pull themselves up to a stable standing position.
- Stage 2 – Stepping Over the Rim: This is the most precarious stage, involving balancing on one leg. A horizontal grab bar positioned along the back wall of the shower/bath area provides a continuous handhold to steady the body during the step-over motion. This bar should also be at a height of 33-36 inches.
- Stage 3 – Final Step onto the Floor: After clearing the tub rim, the user steps onto a bath mat, which can shift. A second vertical grab bar installed on the wall just outside the tub provides a final anchor point to stabilize the body and prevent forward momentum from causing a slip.
It’s also vital to consider the specific layout of UK bathrooms, ensuring that grab bars do not interfere with common fixtures like heated towel rails or radiators, which are often placed near bathtubs. Height should be customized to the user’s centre of gravity for optimal leverage.
Wall-mounted vs freestanding stool: which is safer for a small cubicle?
For individuals who cannot stand for long periods, a shower stool is a critical piece of safety equipment. In the often-compact dimensions of UK shower cubicles (e.g., 760x760mm or 800x800mm), the choice between a permanent wall-mounted stool and a portable freestanding one involves a crucial trade-off between stability and footprint.
A wall-mounted, fold-down stool offers the highest level of stability, as it is anchored directly into the wall studs. When not in use, it folds flat against the wall, maximizing the limited space within the cubicle. However, this is a permanent alteration that requires drilling and is therefore unsuitable for rental properties without explicit landlord permission. A freestanding stool, conversely, requires no installation and can be used immediately, making it the default choice for renters. Its stability depends entirely on its design and, most critically, the quality of its non-slip rubber ferrules (feet). In a small cubicle, its footprint is a significant disadvantage, as it constantly occupies valuable floor space and can become a trip hazard itself.
Case Study: A Systems Approach in a Compact UK Shower
In a standard 760x760mm UK shower cubicle, a round freestanding stool can occupy too much floor space, making movement difficult. A corner-style perching stool, however, can maximize usable floor area while still providing stable support. For a renter with tiles unsuitable for suction bars, this stable freestanding stool becomes the primary safety device. A comprehensive safety net can be created by combining this stool with a single, strategically placed suction bar used purely for light balance (e.g., steadying a hand while washing) and tested vigorously before every single use. This ‘systems approach’ acknowledges the limitations of each device while using them in combination to create a safer environment than either could provide alone.
The following table breaks down the key considerations for a renter making this choice.
| Feature | Wall-Mounted Stool | Freestanding Stool |
|---|---|---|
| Installation | Requires permanent drilling into wall studs | No installation required, immediately usable |
| Footprint in 760mm cubicle | Minimal (folds flat when not in use) | Larger (always occupies floor space) |
| Stability on wet floor | Excellent (anchored to wall) | Good (requires high-quality non-slip ferrules) |
| Weight capacity | Typically 250-300 lbs (structurally supported) | Typically 250-400 lbs (depending on model) |
| Suitability for rental properties | Poor (permanent alteration, requires landlord permission) | Excellent (removable, no property modification) |
| UK supplier examples | NRS Healthcare wall-mounted shower seats | Complete Care Shop adjustable height stools with ferrules |
Folding suitcase ramps vs permanent concrete: which is best for visitors?
Providing safe access for a visitor who uses a wheelchair or mobility scooter presents a different challenge than adapting a home for a permanent resident. While a permanent concrete or wooden ramp is the gold standard for durability and safety, it is often impractical and prohibitively expensive for accommodating occasional guests. For this purpose, folding ‘suitcase’ ramps offer a flexible and effective temporary solution, but selecting the right one requires careful consideration of the unique architectural challenges common in UK homes.
The UK’s housing stock, particularly Victorian and Edwardian properties, presents specific obstacles that a generic ramp may not overcome. A host providing a temporary ramp also assumes a degree of responsibility for the visitor’s safety, making correct selection and deployment critical to prevent accidents.
- Challenge 1 – High Kerbs & Varied Steps: Many UK homes have high Victorian-era kerbs (150-200mm) and varied step heights. It is essential to measure the total vertical rise and choose a ramp long enough to provide a safe gradient (a maximum slope of 1:12 is recommended for independent wheelchair users). Telescopic or multi-fold ramps offer the adjustability needed for this.
- Challenge 2 – Narrow Pathways: Terraced houses often feature narrow front paths (sometimes under 900mm wide). A suitcase ramp must be narrow enough to be deployed safely in the available space and fold compactly for storage.
- Challenge 3 – Cost vs. Need: A quality portable ramp can cost £200-£500. For infrequent visits, it is more practical and cost-effective to contact a UK mobility equipment hire service. Organisations like the British Red Cross or local equipment libraries often provide short-term loans.
- Challenge 4 – Host Liability: When you provide and set up a ramp for a visitor, you must ensure it is used correctly. This means deploying it on level ground, ensuring its anti-slip surface is effective, and verifying that its weight capacity is sufficient for the user and their mobility device.
For temporary visitor access, a folding ramp is unequivocally the better choice over a permanent installation. However, it is a piece of safety equipment that requires the same level of diligence in selection and use as any other mobility aid.
Key Takeaways
- Suction grab bars are inherently unreliable due to the physics of vacuum loss on any non-perfect surface, leading to catastrophic failure without warning.
- The green/red safety indicators are dangerously misleading, as they only confirm initial attachment and cannot predict the inevitable degradation of the seal over time.
- UK renters have a legal right under the Equality Act 2010 to request permanent, screwed-in grab rails as a ‘reasonable adjustment’, which is the only truly safe option.
How to choose the right threshold ramp for a UPVC door frame?
A small step at a doorway can be an insurmountable barrier for a wheelchair user. Threshold ramps are designed to solve this problem, but choosing the correct one for modern UPVC door frames, common across the UK, is more complex than simply measuring the height. UPVC thresholds often have complex, asymmetric profiles with raised weather bars and different internal and external heights, meaning a simple wedge ramp may not fit securely.
Ordering the wrong ramp is a common and costly mistake that results in an unstable and dangerous access solution. A precise, multi-step measurement process is required to ensure a perfect fit. It is also important to remember your rights; under the Equality Act 2010, requesting the installation of a suitable threshold ramp is a valid ‘reasonable adjustment’ for a tenant. As the UK Government notes regarding future implementation, the law is moving towards strengthening these rights, stating that the duty will extend the duty to make reasonable adjustments to common parts of residential property, explicitly including ramp installations.
To ensure you select the correct ramp the first time, follow this detailed measurement guide. Taking a few extra minutes to measure correctly can prevent accidents and wasted money.
- Measure External Height: Measure the vertical distance from the ground outside to the very top of the UPVC sill. This is the primary ‘rise’ measurement.
- Measure Internal Height: Measure the vertical distance from the interior floor to the top of the sill. This is often different from the external height.
- Measure Width: Measure the full width of the door opening that the ramp needs to span. Standard UK door widths are often 838mm or 926mm.
- Analyse the Profile: Look at the threshold from the side. Does it have a raised weather bar or multiple levels? If so, a standard wedge ramp will not work, and you will need a ‘bridge’ style or custom-notched ramp.
- Photograph the Threshold: Take a clear photo from the side showing the profile. This is invaluable when discussing your needs with a supplier to ensure they provide the correct product.
- Verify Material: For outdoor UK use, choose a durable material like rubber or aluminium. Avoid lightweight plastic ramps which can become brittle and slippery in cold, wet weather.
By following these steps, you can confidently select a threshold ramp that provides a safe, stable, and seamless transition, making a home truly accessible.
Your safety, or the safety of a loved one, should not be a gamble based on marketing convenience. The evidence is clear: suction grab bars do not provide the reliable support required in a high-risk environment like a bathroom. The only responsible path forward is to pursue permanent, structurally sound solutions. For renters, this means confidently exercising your legal right to a safe home by formally requesting the installation of screwed-in grab rails. Take the first step today by drafting a formal ‘reasonable adjustment’ request to your landlord.