
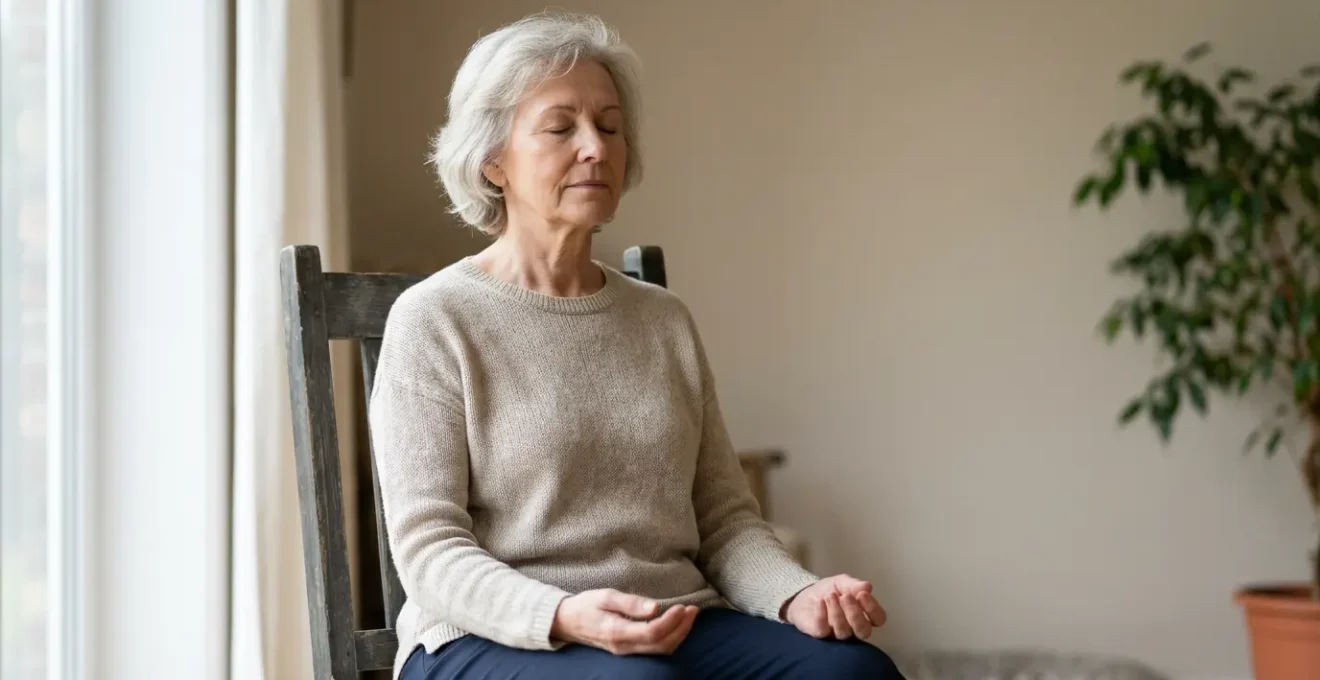
Contrary to the belief that yoga is only for the flexible, chair yoga is a sophisticated system for managing arthritis pain. It’s not about forcing your body into complex poses, but about using gentle, supported movements and targeted breathing to retrain your nervous system, reduce inflammation, and build the functional strength needed for daily activities. This approach makes movement a form of medicine, empowering you to find relief and improve mobility safely.
For many living with the daily reality of arthritis, the idea of exercise can feel like a contradiction. When joints are stiff and sore, the thought of twisting into yoga poses seems not just impossible, but potentially harmful. The common advice to « stay active » often ignores the very real fear of causing more pain. We tend to associate yoga with a level of flexibility that feels entirely out of reach, leading many to dismiss it as an option altogether. This creates a frustrating paradox: the very movement that could bring relief is avoided for fear of the strain it might cause.
But what if the true purpose of yoga for arthritis wasn’t about flexibility at all? What if, instead of being a practice of stretching and bending, it was a precise method for communicating with your body in a new way? The key to unlocking relief lies not in pushing through pain, but in understanding its signals. Chair yoga offers a revolutionary perspective: it uses the support of a chair to remove the fear of falling and the strain on your joints, allowing you to focus on the powerful, therapeutic connection between your breath, your mind, and your body’s innate capacity for healing.
This guide will shift your understanding of yoga from a practice of physical contortion to a tool for neurological regulation and functional strength. We will explore how specific breathing techniques can actively reduce inflammation, how simple, seated movements can translate into easier daily tasks, and how to safely build the strength that reverses frailty. It’s time to discover how you can use chair yoga not to become more flexible, but to become more capable, confident, and comfortable in your own body.
To guide you through this gentle yet powerful practice, this article breaks down the essential components of using chair yoga for arthritis relief. Explore the sections below to learn the science, safety, and practical application of this transformative approach.
Summary: A Gentle Guide to Pain Relief and Renewed Mobility with Chair Yoga
- Why is ‘pranayama’ (breathing) the most vital part of chair yoga for arthritis pain?
- How to do a 10-minute sequence while watching TV?
- Zoom classes vs local hall: is it safe to do yoga alone at home?
- The error of pushing into pain rather than ‘listening to your body’
- How standing behind the chair for support improves fall resilience?
- How chair yoga helps you become an ‘expert patient’ in managing your arthritis
- The error of stopping going out, which actually increases fall risk
- How to reverse ‘frailty’ through strength training after 75?
Why is ‘pranayama’ (breathing) the most vital part of chair yoga for arthritis pain?
When we think of exercise, we focus on muscle and movement. But for arthritis, the most profound changes begin with something much quieter: your breath. In yoga, this is called pranayama, or breath regulation, and it’s far more than simple relaxation. It’s a direct line of communication to your nervous system, which plays a critical role in managing chronic pain and inflammation. The secret lies in its effect on the vagus nerve, a superhighway of the nervous system that connects your brain to your major organs.
When you practice slow, deep, diaphragmatic breathing, you stimulate the vagus nerve. This activation switches your body from a state of stress (« fight or flight ») to a state of rest and recovery (« rest and digest »). For arthritis, this is crucial. A stressed state perpetuates inflammation, the very source of joint pain and damage. By calming the nervous system through breath, you are actively telling your body to dial down its inflammatory response. It’s a powerful internal mechanism for pain management that requires no physical strain.
In fact, this is not just theory; it is backed by science. Groundbreaking research published in the Proceedings of the National Academy of Sciences demonstrates that stimulating the vagus nerve can significantly inhibit the production of inflammatory markers in patients with rheumatoid arthritis. While the study used an implantable device, other research suggests that non-invasive methods like deep breathing can yield similar benefits. This means every slow, intentional breath you take during your chair yoga practice is an act of self-administered therapy, helping to calm the inflammation at its source and change your experience of pain from the inside out.
How to do a 10-minute sequence while watching TV?
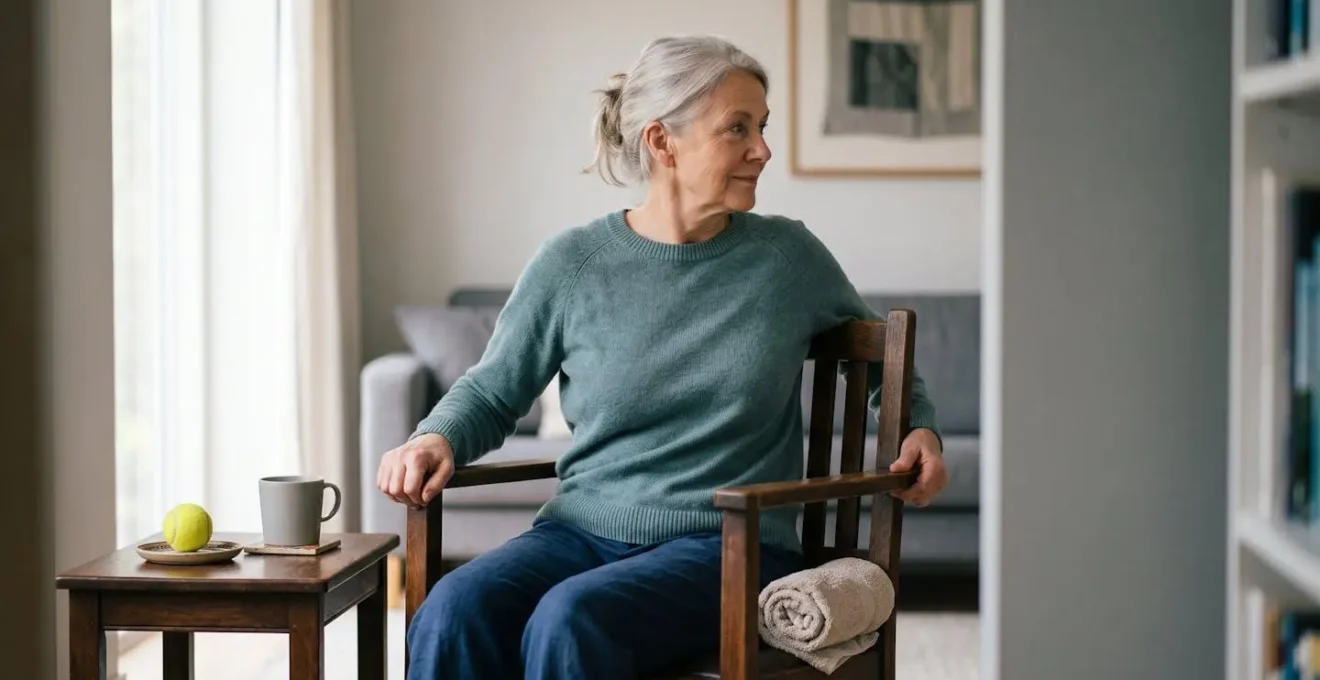
One of the biggest barriers to exercise is the feeling that it must be a separate, time-consuming event. The beauty of chair yoga is its adaptability; you can seamlessly integrate it into your daily routine, such as during a commercial break while watching television. The goal is not a strenuous workout, but consistent, gentle movement that keeps joints mobile and muscles engaged. By linking these movements to an existing habit, you make the practice effortless to maintain.
This 10-minute sequence is designed to address key areas affected by arthritis—the spine, shoulders, wrists, and ankles—using the concept of functional movement. Each pose mimics a real-world action, making daily life easier. For instance, a gentle twist isn’t just a yoga pose; it’s practice for safely looking over your shoulder while driving. You don’t need special clothes or a silent room, just a sturdy chair and the intention to move with your breath.
As you can see, the focus is on ease and accessibility. Below is a simple sequence to follow. Remember to synchronize each movement with your breath—inhaling as you create space or extend, and exhaling as you twist or fold. Let the movement be gentle and controlled, never forced.
- Minute 1-2: Seated Mountain Pose – Sit upright with feet flat on the floor, engage your core, and practice deep diaphragmatic breathing. This establishes a foundation of supported, stable posture.
- Minute 3-4: Seated Cat-Cow (Back-Pain-Free Reach) – Place hands on your knees. As you inhale, arch your spine and look slightly up. As you exhale, round your spine, tucking your chin. This mobilizes the spine, preparing it for daily reaching tasks.
- Minute 5-6: Gentle Seated Twist (Safe-Driver-Check) – Inhale to lengthen your spine. Exhale and gently twist your torso to one side, using the chair for support. Keep your hips stable. This improves the rotational mobility needed for looking over your shoulders.
- Minute 7-8: Ankle and Wrist Circles – Extend one leg and gently circle your ankle in both directions. Do the same with your wrists. This mobilizes these crucial peripheral joints to reduce stiffness and improve circulation.
- Minute 9-10: Seated Forward Fold with Support – Place a rolled towel on your thighs for lumbar support. Inhale to lengthen your spine, and exhale to gently hinge forward from the hips, resting your torso on the towel. This releases lower back tension. Return slowly to a seated position for a moment of quiet breathing.
Zoom classes vs local hall: is it safe to do yoga alone at home?
The rise of online classes has made exercise more accessible than ever, but for seniors, especially those managing arthritis, a critical question arises: is it safe to practice alone at home? While the energy of a local class is wonderful, a home practice offers unparalleled convenience and the ability to truly listen to your own body without comparison. The answer is yes, it is absolutely safe—provided you create a dedicated ‘safe practice bubble’ first.
Safety in chair yoga isn’t about the complexity of the poses, but about the stability of your environment. The primary risks at home are not from the yoga itself but from external factors: an unstable chair, a cluttered space, or reaching for a prop mid-pose and losing balance. By taking a few minutes to prepare your space, you mitigate nearly all potential hazards. This proactive approach transforms your corner of the living room into a secure sanctuary for movement.
Think of it as your pre-flight checklist. Just as a pilot inspects their plane before takeoff, you should inspect your yoga space before you begin. This simple ritual not only ensures your physical safety but also builds mental confidence, allowing you to relax fully into the practice, knowing you have created a supportive environment. The following checklist outlines the essential steps to create your ‘safe practice bubble’ at home.
Your Checklist for a Safe Home Chair Yoga Practice
- Chair Stability Test: Use a sturdy, four-legged chair without wheels. Press down firmly on the seat and armrests to ensure it doesn’t wobble or slide on your floor.
- 360-Degree Clear Space: Remove all obstacles within a 3-foot radius around your chair. This includes coffee tables, pet toys, rugs with curled edges, and electrical cords that could be tripping hazards.
- Props Within Arm’s Reach: Before you start, place any props you might use—like a yoga strap (or a belt), a rolled towel, or a small cushion—on a stable side table so you don’t have to awkwardly reach or stand up mid-session.
- Emergency Phone Nearby: Keep your charged mobile or home phone on the side table, within easy reach, just in case you need to call for assistance.
- Well-Lit Environment: Practice in a brightly lit room. Good lighting, whether natural or artificial, is crucial for clearly seeing your body’s position and avoiding any unseen obstacles.
The error of pushing into pain rather than ‘listening to your body’
In a culture that often glorifies « no pain, no gain, » one of the most dangerous mistakes in managing arthritis is applying this logic to your joints. Pushing into sharp pain is not a sign of strength; it’s a signal that you are causing potential tissue damage and increasing inflammation. The most crucial skill in therapeutic movement is learning to differentiate between the productive feeling of a muscle stretching (therapeutic discomfort) and the body’s alarm bell (warning pain). As Dr. Steffany Moonaz, a leading researcher in yoga for arthritis, emphasizes, « In order to be safe and effective, yoga must also be appropriate for people living with arthritis. » Appropriateness begins with honoring your body’s signals.
This is the essence of « listening to your body. » It means becoming a detective of your own sensations. Therapeutic discomfort often feels like a dull, warm, releasing sensation spread over a broad muscle area. It’s the feeling of tissues safely lengthening. Warning pain, however, is typically sharp, shooting, or electric. It is often located in a very specific, pinpoint location, usually right on the joint line. This is your body’s non-negotiable stop sign. Ignoring it is like continuing to drive with the oil light flashing.
The following table, based on principles from experts at the Johns Hopkins Arthritis Center, is designed to be your guide. It decodes your body’s language, helping you identify which sensations are safe to work with and which demand an immediate retreat. Your goal is to practice primarily in the « Neutral Sensation » or « Therapeutic Discomfort » zones, as this is where healing and adaptation occur without causing harm.
| Signal Type | Sensation Description | Body Location | What It Means | Appropriate Action |
|---|---|---|---|---|
| Therapeutic Discomfort (SAFE) | Dull, warm, releasing sensation; feels like gentle stretching or mild muscle engagement | Muscle belly, broad area | Tissues are safely lengthening and warming up; natural adaptation occurring | Continue movement at current intensity; maintain steady breathing |
| Warning Pain (STOP) | Sharp, shooting, electric sensation; sudden stabbing or increasing ache | Joint line, specific pinpoint location | Potential tissue damage or inflammation; body signaling danger | Immediately retreat from position; reduce range of motion by 50% or stop entirely |
| Neutral Sensation (IDEAL) | Gentle awareness of movement without discomfort; feeling of control and ease | Throughout moving area | Optimal safe zone for arthritis management and healing | This is your target zone; practice primarily here for long-term benefit |
How standing behind the chair for support improves fall resilience?
While seated poses are the foundation of chair yoga, incorporating supported standing work is the key to building real-world resilience against falls. A fear of falling can be debilitating, leading to a decrease in activity that, paradoxically, weakens the very systems that keep us upright. Using a chair for support provides a « safety net » that allows you to confidently retrain your body’s balance system, known as proprioception. This system is a network of sensors in your muscles and joints that tells your brain where your body is in space. With age and arthritis, these signals can become weaker, but they can be retrained.
When you stand behind a chair, lightly resting your hands on its back, you are not using it to hold your weight. Instead, your fingertips become extensions of your nervous system, providing constant feedback about your stability. This allows you to safely challenge your balance in small, controlled ways, such as by lifting one foot, rocking from heels to toes, or shifting your weight. Each of these micro-challenges forces your ankles, knees, and hips to make tiny adjustments, strengthening the muscles and re-calibrating the neural pathways responsible for maintaining your balance.
This isn’t just a hopeful theory; it’s a proven intervention. For instance, a pilot study in an assisted living community found that chair yoga significantly improved balance and reduced the fear of falling among seniors. By practicing these controlled movements in a safe environment, you are essentially rehearsing for the unexpected trip or stumble in daily life. You are teaching your body to react more quickly and effectively, transforming the chair from a simple piece of furniture into a powerful tool for building independence and confidence. A 12-week proprioception training program demonstrated this by improving gait scores by 14.66% and balance scores by 11.47%, proving that targeted exercises directly decrease fall risk.
How chair yoga helps you become an ‘expert patient’ in managing your arthritis
Managing a chronic condition like arthritis is not just about following a doctor’s orders; it’s about becoming an active participant in your own care. The concept of the ‘Expert Patient’ is built on this principle: you are the one who lives in your body 24/7, and with the right tools, you can become the leading expert on your own symptoms, triggers, and what brings relief. Chair yoga is one of the most effective tools for developing this expertise because it combines physical movement with mindful observation.
The practice encourages you to pay close attention to your body in a structured, gentle way. After each session, you have a fresh set of data about your physical and emotional state. Was the stiffness in your hands better or worse? Did moving your shoulders feel easier than yesterday? Did you feel more energized or calmer afterward? Tracking these observations is the key to unlocking patterns you might otherwise miss. This self-monitoring transforms your yoga practice from a simple exercise into a sophisticated diagnostic tool.
Creating a simple post-practice journal is a powerful way to formalize this process. It doesn’t need to be elaborate—just a few notes can reveal invaluable insights over time. This information empowers you to make smarter daily choices and have more productive conversations with your healthcare providers. You can show them exactly how your pain levels or mobility are responding, turning a vague report of « feeling a bit better » into concrete evidence. Use this simple framework to start tracking your progress:
- Pain Level (1-10 Scale): Rate your overall pain and pain in specific joints before and after your practice. Note what felt better or worse.
- Stiffness Assessment: Document how long your morning stiffness lasts. After practice, note if your range of motion improved (e.g., ‘could reach the top cupboard more easily’).
- Mood Check: Use a few words to describe your emotional state (e.g., calm, energized, hopeful, frustrated). This helps track the mental health benefits.
- Functional Wins: Record any daily activities that felt easier. Did you get up from a chair without using your arms? Walk to the mailbox without stopping? These are major victories.
- Pattern Identification: Once a week, review your notes. Can you correlate your pain levels with other factors like sleep quality, stress, or even the weather? This is crucial information to share with your doctor.
Key Takeaways
- Chair yoga’s primary benefit for arthritis is not flexibility, but nervous system regulation and inflammation reduction through breathwork (pranayama).
- The practice should focus on ‘functional movements’ that directly translate to easier and safer daily activities, such as reaching or turning.
- Learning to distinguish between ‘therapeutic discomfort’ (safe) and ‘warning pain’ (harmful) is the most critical skill for a safe and effective practice.
The error of stopping going out, which actually increases fall risk
When joint pain and a fear of falling begin to loom large, the instinct to retreat can be overwhelming. Staying home feels like the safest option. However, this withdrawal creates a dangerous and self-perpetuating cycle: fear leads to inactivity, inactivity leads to muscle weakness and poor balance, and this weakness dramatically increases the actual risk of a fall. Every day spent avoiding movement is a day the body deconditions, making the outside world seem even more hazardous. This pattern is a well-documented phenomenon; according to the University of Michigan National Poll on Healthy Aging, arthritis is strongly associated with reduced physical activity and higher rates of falls.
Breaking this cycle is not about being reckless; it’s about being strategic. The strength, balance, and confidence you build during your safe, supported chair yoga practice at home are your tools for re-engaging with the world. The supported standing poses that retrain your proprioception and the gentle strengthening exercises that combat frailty are not just for your living room. They are your preparation for navigating uneven sidewalks, stepping off a curb, or carrying groceries with stability.
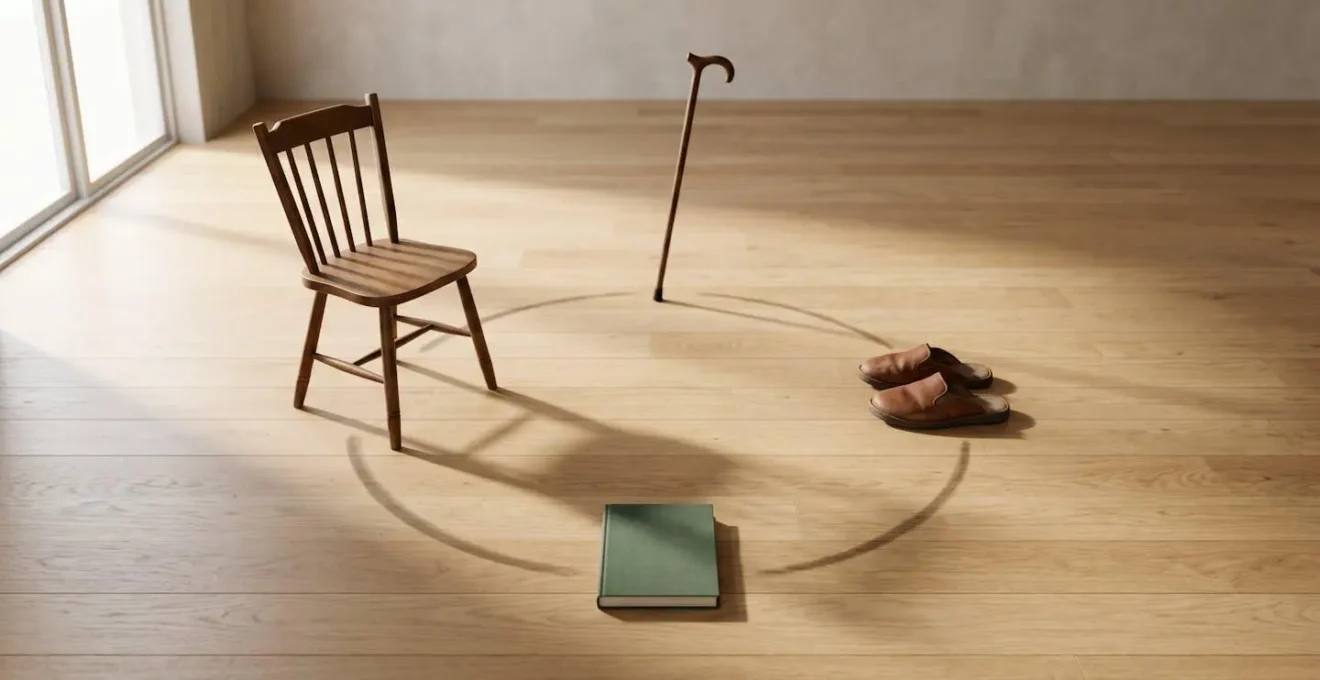
This image of the cane, the shoes, the journal, and the chair illustrates the cycle of withdrawal. The cane represents pain, the shoes represent the hesitation to move, the closed journal symbolizes isolation, and the empty chair signifies immobility. The goal of your practice is to break this chain. By using the chair as a tool for strength (not just for sitting), you build the physical capacity to put on those shoes and walk out the door, transforming the cycle from one of decline to one of empowerment and renewed engagement with life.
How to reverse ‘frailty’ through strength training after 75?
Frailty is not an inevitable consequence of aging. It is a specific medical syndrome characterized by a loss of muscle mass, strength, and stamina, which increases vulnerability. The good news is that it is often reversible, and the most powerful antidote is progressive resistance training. Chair yoga, when approached correctly, is a perfect, joint-safe form of this training. With a prevalence of arthritis affecting nearly half of older adults— data from the CDC shows that 48% of adults aged 65+ had diagnosed arthritis—finding a safe way to build strength is paramount.
Case Study: Chair Yoga Improves Functional Fitness in Older Women
A compelling 12-week study involving 85 women over 65 with knee osteoarthritis showcased the power of this approach. Participants attended twice-weekly chair yoga sessions. The results were significant: not only did they report improved daily life activity scores, but their functional fitness saw marked improvements. Specifically, agility and dynamic balance improved by an average of 10.43%, and both upper and lower-extremity muscle strength increased. This demonstrates that a structured chair yoga program is a viable intervention to reverse frailty markers, improve function, and reduce fall risk for older adults with osteoarthritis.
The key to success is the principle of ‘progressive’ overload. This means starting with your own body weight and then gradually and safely adding small amounts of resistance. This challenges your muscles just enough to stimulate growth without ever straining your joints. It’s about getting stronger, not just stretching. The following is a sample progression that can be adapted to your individual level. The rule is always to listen to your body: the movement should feel challenging, but never painful.
- Weeks 1-2: Master Bodyweight Isometric Holds. Start by engaging muscles without movement. For example, press your palms together firmly at chest level for 10 seconds, or sit and squeeze a small cushion or yoga block between your knees for 10 seconds. This builds foundational muscle awareness.
- Weeks 3-4: Add Light Resistance Bands. Loop a light resistance band around the front legs of your chair and practice seated leg extensions. This introduces a safe, external load to begin strengthening the quadriceps.
- Weeks 5-6: Incorporate 1-2 lb Hand Weights. Use very light dumbbells for movements like seated bicep curls and overhead presses, always coordinating the movement with your breath. This progresses strength work in a joint-safe manner.
- Weeks 7-8: Progress to Sit-to-Stand Practice. This is one of the most functional exercises. Practice rising from the chair to a standing position and slowly lowering yourself back down, trying not to use your hands. This builds critical lower-body strength for independence.
- Ongoing: Monitor and Adjust. If any joint pain emerges, immediately reduce the resistance or return to the previous week’s level. Progression is a long-term journey, not a race.
By integrating these principles, you are not just doing exercises; you are actively investing in a stronger, more resilient, and more confident future. Begin today by choosing one small movement, one deep breath, and take the first step toward reclaiming your mobility.